
As a disclaimer, this recipe isn't as simple and quick as the majority of the other recipes I post. Most of the time, I like meals that are easy, that use ingredients I have on hand, and that I know my family will love, but in this case, we decided that the time and effort was worth the result, and I think it really turned out well. It isn't so much that making the cake is difficult; it is instead time-consuming, with several steps that have hours of freezing time between them. So, if you plan to make this, allow yourself a couple of days; it isn't something you can throw together at the last minute.
I haven't made it again since Christmas (There hasn't really been an occasion for it.), but I would love to play around with the flavors (see my note at the bottom of the recipe), and I definitely plan to make it again for a special occasion. It would be fantastic for a birthday, anniversary, holiday, etc...
I found this recipe on a Food Network show called "Dessert First." I love the host's take on dessert, how unique and decadent her recipes are, and how simply she explains the steps. I watched the show and paused along the way instead of just following the recipe and it helped tremendously. If you haven't seen the show before, definitely check it out!
Chocolate Peppermint Ice Cream Cake
Ingredients
Crust:
Directions
For the crust:
1) In a small heavy bottom saucepan over low heat, melt the butter and chocolate.
2) Remove from the heat.
3) Finely crush the chocolate wafers in a plastic bag with a rolling pin, or use a food processor.
4) In a large bowl, combine the wafer crumbs with the melted chocolate and blend until the crumbs are moistened.
5) Reserve 1 1/4 cups crumb mixture in a small bowl.
6) Press the remaining crumb mixture onto the sides and bottom of a 9-inch diameter springform pan with 2 3/4-inch high sides.
7) Freeze for 1 hour.
For the glaze:
1) In a large heavy bottom saucepan, bring the cream and corn syrup to a boil.
2) Remove from heat, add the chocolate, andwhisk until it is melted and smooth.
3) Let stand until cool but still pourable, about 1 hour.
For the filling:
1) In a large bowl, working quickly, mix the ice cream, crushed candies, and extract until blended.
2) Spoon half of the ice cream into the crust, spreading it evenly.
3) Put the remaining ice cream mixture in the bowl in the freezer.
4) Sprinkle the reserved 1 1/4 cup cookie crumb mixture over the ice cream in the springform pan, press the crumbs down gently.
5) Pour 1 1/4 cup of the chocolate glaze over the ice cream in the springform pan.
6) Freeze for 1 hour.
7) Top with the remaining ice cream, and spread evenly.
8) Freeze until firm, about 4 hours. Stir the remaining glaze over low heat, just enough so that it is pourable but not warm.
9) Pour the glaze over the ice cream, and spread evenly.
10) Freeze overnight.
11) Run a sharp warm knife between the pan sides and the crust to loosen the cake.
12 Release the pan sides and transfer the cake to a platter.
13) Garnish the cake with Candy Brittle.
*Note from Laura: Even though this is how the recipe reads, if I were doing it again, I would switch steps 4 and 5, pouring the glaze first and then sprinkling the crumbs. It was hard to get the glaze to cover the whole layer after I put the crumbs on first.
Candy Brittle:
2) Increase the heat and boil, without stirring, until a candy thermometer registers 300 degrees F, about 15 minutes.
3) Place a 24-inch long sheet of foil on your work surface. Be extremely careful, the syrup is extremely hot.
4) Pour the boiling syrup in wide zigzag lines across the foil.
5) Working quickly and using an oiled offset metal spatula, spread the syrup evenly onto the foil, leaving a 1-inch border.
6) Immediately sprinkle with all the candies, pressing the larger pieces into the syrup to make sure they stick. Be careful not to touch the syrup.
7) Cool completely.
8) Break off irregular pieces of the brittle and peel off the foil as you go.
9) Press the brittle upright, candy side out, onto the top and sides of cake and freeze.
*NOTE OF RECIPE CHANGE: I personally LOVE the chocolate/peppermint combination, but my family was not so keen on the idea, so instead of making my own peppermint ice cream, as the recipe calls for, I instead used cookies and cream ice cream, and it went over just as well. I would like to try the peppermint next time, however.
Crust:
- 1/2 cup plus 3 tablespoons unsalted butter
- 1 2/3 cups semisweet chocolate
- 2 (9-ounce) packages chocolate wafer cookies (about 80 cookies)
- 3/4 cup heavy cream
- 1/4 cup plus 3 tablespoons light corn syrup
- 1/2 cup semisweet chocolate
- 8 cups vanilla ice cream, slightly softened
- 1 1/2 cups coarsely crushed red and white striped hard peppermint candies (about 10 ounces)
- 2 teaspoons peppermint extract
Directions
For the crust:
1) In a small heavy bottom saucepan over low heat, melt the butter and chocolate.
2) Remove from the heat.
3) Finely crush the chocolate wafers in a plastic bag with a rolling pin, or use a food processor.
4) In a large bowl, combine the wafer crumbs with the melted chocolate and blend until the crumbs are moistened.
5) Reserve 1 1/4 cups crumb mixture in a small bowl.
6) Press the remaining crumb mixture onto the sides and bottom of a 9-inch diameter springform pan with 2 3/4-inch high sides.
7) Freeze for 1 hour.
For the glaze:
1) In a large heavy bottom saucepan, bring the cream and corn syrup to a boil.
2) Remove from heat, add the chocolate, andwhisk until it is melted and smooth.
3) Let stand until cool but still pourable, about 1 hour.
For the filling:
1) In a large bowl, working quickly, mix the ice cream, crushed candies, and extract until blended.
2) Spoon half of the ice cream into the crust, spreading it evenly.
3) Put the remaining ice cream mixture in the bowl in the freezer.
4) Sprinkle the reserved 1 1/4 cup cookie crumb mixture over the ice cream in the springform pan, press the crumbs down gently.
5) Pour 1 1/4 cup of the chocolate glaze over the ice cream in the springform pan.
6) Freeze for 1 hour.
7) Top with the remaining ice cream, and spread evenly.
8) Freeze until firm, about 4 hours. Stir the remaining glaze over low heat, just enough so that it is pourable but not warm.
9) Pour the glaze over the ice cream, and spread evenly.
10) Freeze overnight.
11) Run a sharp warm knife between the pan sides and the crust to loosen the cake.
12 Release the pan sides and transfer the cake to a platter.
13) Garnish the cake with Candy Brittle.
*Note from Laura: Even though this is how the recipe reads, if I were doing it again, I would switch steps 4 and 5, pouring the glaze first and then sprinkling the crumbs. It was hard to get the glaze to cover the whole layer after I put the crumbs on first.
Candy Brittle:
- 2 1/4 cups sugar
- 3/4 cup water
- 2 tablespoons plus 2 teaspoons light corn syrup
- 2 cups assorted candies (hot cinnamon candies, after dinner mints, candy cane pieces, sliced spice drops)
2) Increase the heat and boil, without stirring, until a candy thermometer registers 300 degrees F, about 15 minutes.
3) Place a 24-inch long sheet of foil on your work surface. Be extremely careful, the syrup is extremely hot.
4) Pour the boiling syrup in wide zigzag lines across the foil.
5) Working quickly and using an oiled offset metal spatula, spread the syrup evenly onto the foil, leaving a 1-inch border.
6) Immediately sprinkle with all the candies, pressing the larger pieces into the syrup to make sure they stick. Be careful not to touch the syrup.
7) Cool completely.
8) Break off irregular pieces of the brittle and peel off the foil as you go.
9) Press the brittle upright, candy side out, onto the top and sides of cake and freeze.
*NOTE OF RECIPE CHANGE: I personally LOVE the chocolate/peppermint combination, but my family was not so keen on the idea, so instead of making my own peppermint ice cream, as the recipe calls for, I instead used cookies and cream ice cream, and it went over just as well. I would like to try the peppermint next time, however.
 |
| straight from the freezer, before decorating |
 |
| finished candy brittle, before breaking |
 |
| ready to eat! |

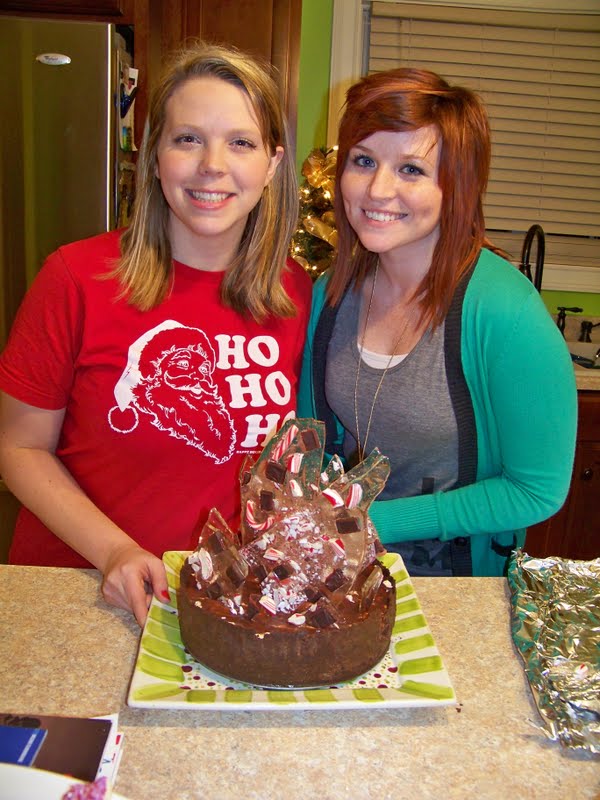 |
| with our masterpiece :) |
 |
| digging in |
2 comments:
That looks so yummy, and like so much fun to eat. I want to make one...but not this week. Almost all the ingredients aren't allowed by my (self imposed) restrictions this week.
Thanks! It was time-consuming, but well worth the outcome. Everyone loved it...or at least they said so. :)
I hope your week of minimally-processed foods is going well. I would definitely have a tough time with that.
Post a Comment