Friday, July 29, 2011

Friday Facts and Photos

With only one week left of summer break, Connor and I have been taking advantage of every opportunity to be outside.  Whether it be playing in his "house" (as I posted here), walking to see the cows in the field next to our house, or pushing his trucks and tractors all around the yard, my boy would rather be outside than anywhere.

However, this week, we have been spending as much time as possible cooling off at the pool.  Three afternoons have been spent lounging, splashing, and reapplying sunscreen. 

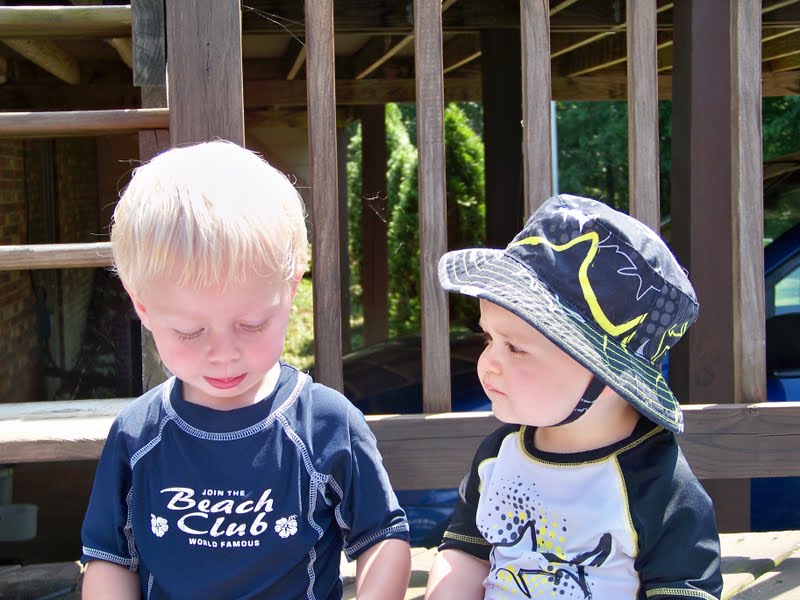
We have had play dates with friends...

Connor and Gavin


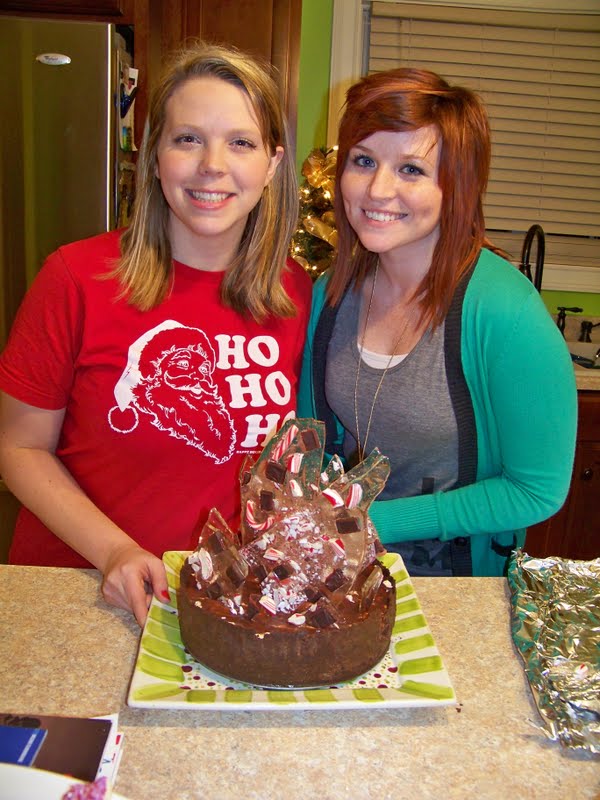
and quality time with family...


Besides swimming, Connor has spent lots of time coloring with Daddy...


This week's random facts:

* We just bought Connor a potty chair.  I do not believe he is really ready to potty train yet, but he has been asking about the potty a lot, so one is in the bathroom in case he asks.  :)

* When Connor has a scrape, bump, or other boo boo, he always consoles himself by saying, "Better, better."  If someone does not respond within a few seconds by kissing the spot, he'll say "Kiss it."

* He has also learned the word "smooch" this week, and likes to use it when he wants some loving.

* Recently, when something upsets Connor and he is crying, he'll look at me, scrunch up his face, and say, "I cryin'."  It's pitiful and adorable all at the same time.

* Connor has also recently started showing signs of a bit of a 'country' accent.  He says things like, "Shew, I'm tard" (tired) and draws out words like "bed," "head," and "man."

* I am currently obsessed with frozen yogurt and rainbow sprinkles as a between-meals treat.  Maybe it's not healthy, but it's yummy.

* Mimi got Connor a rolling Toy Story backpack for his new babysitter's house, and he now drags it everywhere he goes (along with Muno and Guppy, which we already take everywhere we go).  He is so proud of his own little tote.

*Also on the gift front, Ninny (Aunt Linds) found Connor a Buzz Lightyear costume.  He loved looking at himself in the mirror in this outfit:


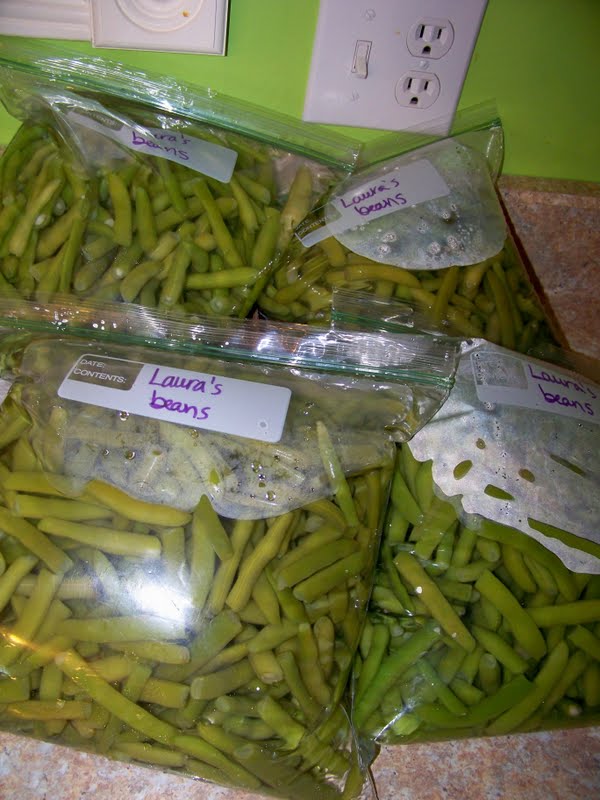
* One of my biggest accomplishments this week was breaking and stringing, and then preparing to freeze four gallon bags full of green beans.  Gran has graciously given me lots of stuff from her garden, and I'm hoping this supply will last us through the winter.  All three of us love fresh green beans.


* Open house for freshman at my school is tonight.  I am, as always, nervous.  Even after eight years, it is still a little scary meeting all those new faces of students and parents.  I want to make a good impression but also be myself (not too formal), and I end up at the end of it all feeling sweaty and ragged.


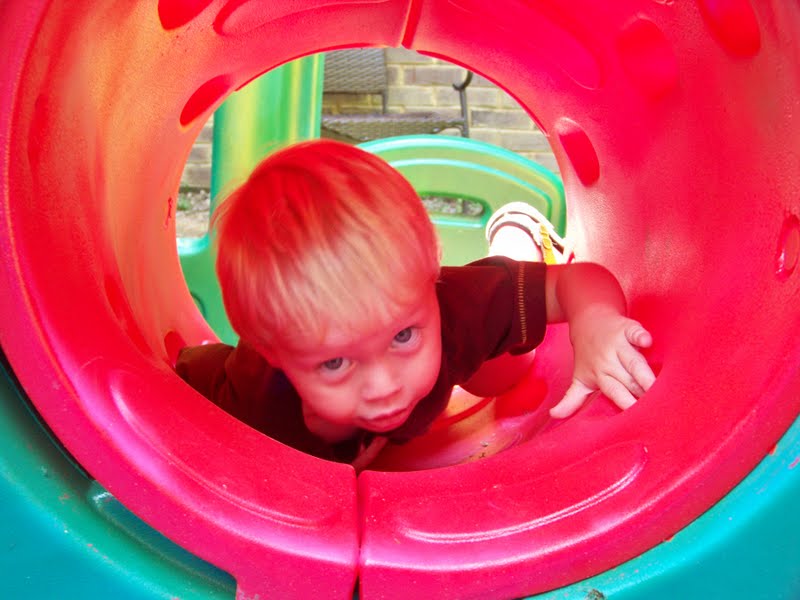
Other random photos of the week:

lovin' the outdoors

getting kisses from a superhero

Have a blessed weekend, friends!

Thursday, July 28, 2011

22 Months

Dear Connor,

Today you are 22 months old.  It is nearly impossible for me to believe how quickly time has flown by since your birth.  I also don't know what I did with all of my free time before you were born, because you fill mine and your daddy's days with energy, excitement, fun, and lots of love.


Being your mommy is better than I could have ever dreamed.  God blessed us with a rowdy but sweet, energetic but affectionate, loud but articulate little character, and you have made life richer than I ever knew it could be.  Because of you, I understand unconditional love.  I pray that you know how very much you are loved, always by me, but especially by your heavenly Father.  You are such a special creation.

Just in the last few weeks, you have started saying "wuv u" (love you) and it melts my heart every time. 

You are very opinionated, feisty, and want things organized in a certain way (much like me).  You love to talk, and you love people, saying hi to nearly everyone you see.

Your current loves are Yo Gabba Gabba (Muno is your favorite.), Dino Dan (A strange little show about a kid who can see dinosaurs that no one else does.), and Toy Story (which you call "Woody").

You have a mischievous smile and a sparkle in your eye (just like your daddy), and sometimes you are so cute it's hard for me to keep a straight face at some of your antics, even though I have to correct you.


I pray that you continue to grow, strong and healthy, and that you will someday be a great man of God.  I love you to the moon and back, Bug.


Love,
Mommy


Wednesday, July 27, 2011

Ice Cream Cake

Last Christmas, my sis Linds and I took up the challenge of making our own ice cream cake for our family's game night/Christmas celebration, which means that this is an old recipe, but one I haven't shared before.

As a disclaimer, this recipe isn't as simple and quick as the majority of the other recipes I post.  Most of the time, I like meals that are easy, that use ingredients I have on hand, and that I know my family will love, but in this case, we decided that the time and effort was worth the result, and I think it really turned out well.  It isn't so much that making the cake is difficult; it is instead time-consuming, with several steps that have hours of freezing time between them.  So, if you plan to make this, allow yourself a couple of days; it isn't something you can throw together at the last minute.

I haven't made it again since Christmas (There hasn't really been an occasion for it.), but I would love to play around with the flavors (see my note at the bottom of the recipe), and I definitely plan to make it again for a special occasion.  It would be fantastic for a birthday, anniversary, holiday, etc...

I found this recipe on a Food Network show called "Dessert First."  I love the host's take on dessert, how unique and decadent her recipes are, and how simply she explains the steps.  I watched the show and paused along the way instead of just following the recipe and it helped tremendously.  If you haven't seen the show before, definitely check it out!


Chocolate Peppermint Ice Cream Cake

Ingredients

Crust:
  • 1/2 cup plus 3 tablespoons unsalted butter
  • 1 2/3 cups semisweet chocolate
  • 2 (9-ounce) packages chocolate wafer cookies (about 80 cookies)
Glaze:
  • 3/4 cup heavy cream
  • 1/4 cup plus 3 tablespoons light corn syrup
  • 1/2 cup semisweet chocolate
Filling:
  • 8 cups vanilla ice cream, slightly softened
  • 1 1/2 cups coarsely crushed red and white striped hard peppermint candies (about 10 ounces)
  • 2 teaspoons peppermint extract

Directions

For the crust:

1) In a small heavy bottom saucepan over low heat, melt the butter and chocolate.
2) Remove from the heat.
3) Finely crush the chocolate wafers in a plastic bag with a rolling pin, or use a food processor.
4) In a large bowl, combine the wafer crumbs with the melted chocolate and blend until the crumbs are moistened.
5) Reserve 1 1/4 cups crumb mixture in a small bowl.
6) Press the remaining crumb mixture onto the sides and bottom of a 9-inch diameter springform pan with 2 3/4-inch high sides.
7) Freeze for 1 hour.


For the glaze:

1) In a large heavy bottom saucepan, bring the cream and corn syrup to a boil.
2) Remove from heat, add the chocolate, andwhisk until it is melted and smooth.
3) Let stand until cool but still pourable, about 1 hour.


For the filling:

1) In a large bowl, working quickly, mix the ice cream, crushed candies, and extract until blended.
2) Spoon half of the ice cream into the crust, spreading it evenly.
3) Put the remaining ice cream mixture in the bowl in the freezer.
4) Sprinkle the reserved 1 1/4 cup cookie crumb mixture over the ice cream in the springform pan, press the crumbs down gently.
5) Pour 1 1/4 cup of the chocolate glaze over the ice cream in the springform pan.
6) Freeze for 1 hour.
7) Top with the remaining ice cream, and spread evenly.
8) Freeze until firm, about 4 hours. Stir the remaining glaze over low heat, just enough so that it is pourable but not warm.
9) Pour the glaze over the ice cream, and spread evenly.
10) Freeze overnight.
11) Run a sharp warm knife between the pan sides and the crust to loosen the cake.
12 Release the pan sides and transfer the cake to a platter.
13) Garnish the cake with Candy Brittle.

*Note from Laura: Even though this is how the recipe reads, if I were doing it again, I would switch steps 4 and 5, pouring the glaze first and then sprinkling the crumbs.  It was hard to get the glaze to cover the whole layer after I put the crumbs on first.


Candy Brittle:
  • 2 1/4 cups sugar
  • 3/4 cup water
  • 2 tablespoons plus 2 teaspoons light corn syrup
  • 2 cups assorted candies (hot cinnamon candies, after dinner mints, candy cane pieces, sliced spice drops) 
1) In a heavy bottom small saucepan over medium-low heat, cook the sugar, water, and corn syrup until the sugar dissolves.
2) Increase the heat and boil, without stirring, until a candy thermometer registers 300 degrees F, about 15 minutes.
3) Place a 24-inch long sheet of foil on your work surface. Be extremely careful, the syrup is extremely hot.
4) Pour the boiling syrup in wide zigzag lines across the foil.
5) Working quickly and using an oiled offset metal spatula, spread the syrup evenly onto the foil, leaving a 1-inch border.
6) Immediately sprinkle with all the candies, pressing the larger pieces into the syrup to make sure they stick. Be careful not to touch the syrup.
7) Cool completely.
8) Break off irregular pieces of the brittle and peel off the foil as you go.
9) Press the brittle upright, candy side out, onto the top and sides of cake and freeze.


*NOTE OF RECIPE CHANGE: I personally LOVE the chocolate/peppermint combination, but my family was not so keen on the idea, so instead of making my own peppermint ice cream, as the recipe calls for, I instead used cookies and cream ice cream, and it went over just as well.  I would like to try the peppermint next time, however.


straight from the freezer, before decorating

finished candy brittle, before breaking


ready to eat!


with our masterpiece  :)
digging in

Monday, July 25, 2011

A Band-Aid Day

Today began and ended with Band-Aids, both figuratively and literally.  This morning, Jason and I ripped off the Band-Aid of summer break, and spent a few hours working in our rooms to prepare for the upcoming school year.  It always seems that (although we love our jobs) we have a hard time accepting the end of another fun-filled summer.  Going to our rooms to dust, arrange, and put out our trinkets seems to mean that we have conceded that it really is over.

However, with the help of a former student (Thanks, Breanna!), we were able to accomplish much, and still have time to spend the afternoon playing with our favorite boy in the world.


enjoying a snack in his "house"


mastering the art of the tunnel

"I see you!"


wielding a stick

"jumpin"


We did, however, end the day with a second Band-Aid (Connor's first ever), but this time we were putting one on instead of ripping it off.  In all his intense stump-jumping, he reinjured a healing knee wound:


But he was patched up and all better in no time:


Enjoying a day of Band-Aids with my favorite boys; there is no place I'd rather be! Have a blessed week!

One Thing Remains

Thanks to the (mostly) impressive musical taste of Jason and Linds (the sister), I have found a few new favorite songs lately, so I thought I'd share one of them with you, and maybe more to follow.

 This song (by Jesus Culture) is on constant repeat in my car currently.  It's a great reminder that God's love never does fail, He doesn't give up on us, even when we may give up on ourselves (or others).


I hope you are as blessed as I was by the words and passion of this song.

Sunday, July 24, 2011

Hair and Beauty Help Needed

This might seem like it has totally nothing to do with my post title, but I am currently loving Pinterest.  If you are like me and you always tell yourself that you'll remember where you saw a home idea or cute outfit but continually forget, you too will love this site.  It is basically a virtual pinboard where you can "pin" onto your own set of boards (You can title and organize them however you like.) things/ideas/clothes/etc.... that you don't want to forget.  I no longer have to print something out and find a manila folder, or make yet another folder on my computer; all of my ideas are in one place.  It has been very helpful in getting ideas for Connor's 2nd birthday party.  It is nice ot see what other people have done and not have to reinvent the wheel.

So, that being said, Pinterest has also been helpful in exposing me to lots of different hair, makeup, and beauty trends that I'd love to try.  So, below you will see, embedded from Pinterest, some of the things I am hoping to try with hair and beauty.  Feel free to tell me what you think, even if that means you are saying I'm too old for some of these trends.  :)


This is the hair color I'd ideally love to have.  I like the combination of light with the more golden blond.
Source: None via Laura on Pinterest


I have been thinking about going back to heavier bangs.  Maybe something like this?


or this?


or this? (style not color)


I really like the layers and bangs in this look, but not sure how it will translate for my features.


Love the fact that there is sparkle, but still sophisticated.  Right?  :)
Source: None via Laura on Pinterest


I have actually seen these Sally Hansen nail strips in person and they are adorable.
Source: None via Laura on Pinterest


These are Sally Hansen nail strips, too.  I'm pretty sure my mom would say these are tacky.  :)


I LOVE braids, but I am terrible at braiding...any tips?


I love how this looks casual and a bit messy, but still chic...again, if only I could braid.


I'd love to know your thoughts on what looks you think I should try/avoid (not that I'll listen)  :) , and I hope you check out Pinterest soon!

Saturday, July 23, 2011

Pita Pizza

This summer, Jason and I have really tried, when we aren't traveling, to eat all three meals at home, instead of being tempted to run out and get something.  We have made some massive trips to the grocery store, but as a result, we have had some great successes in learning to fix a filling, usually healthy lunch while we are at home all day.  It is easy for me at home to snack, but when we make a concerted effort to make a "real" lunch, I find that I don't munch on chips or cookies as often.

I have to give full credit for this recipe to Jason and Men's Health magazine.  Jason introduced me to this recipe when he was on one of his Abs Diet kicks (which he is back on again...sometimes I hate how easily he can lose weight, when I struggle so much).

What I love about this recipe is that it is one of my favorite foods, pizza, but done in a way that makes it healthy, and the perfect portion for lunch.  The ingredients are minimal and common in most households.

Pita Pizza

Ingredients
whole wheat pitas
marinara sauce (or other pizza/tomato sauce you like -- We LOVE Kroger's organic marinara sauce...it has a great flavor.)
shredded mozzarella cheese
*any other pizza toppings you like/have on hand (I make mine plain cheese, but Jason likes Canadian bacon on his.)

Steps
1) Preheat oven to 475.

2) Place pitas on baking sheet. (I use my Pampered Chef pizza stone b/c I think it cooks the best.)

3) Spoon marinara sauce onto pitas. (I like a lot of sauce, so I use about 3 tablespoons per pita.)

4) Sprinkle cheese on top of sauce, as little or as much as you like.
5) Add any other pizza toppings you like.

6)  Bake for 6 minutes.

7) Remove from oven, let cool, and cut into slices.


Even Connor likes these easy pita pizzas!  Hope you enjoy!

Friday, July 22, 2011

BLT Fries

If you've read my post about Bourbon Ball French Toast here, you know that I love breakfast from Lynn's Paradise Cafe in Louisville.  My second favorite breakfast there, below the French toast, is definitely the BLT fries.  Essentially they are fried potatoes with cheese, bacon, spinach, onions, tomatoes, and sour cream (Lynn's uses a horseradish sour cream.).

Here is the recipe from Lynn's:


Ingredients

1 1/2 C. Spinach (shaved)
1/2 C. Bacon (diced and crisped)
1 C. grated Jack Cheese
1/4 C. diced tomatoes
1/4 C. Red Onion - diced and gently sauteed
1 plate Idaho Russet hash brown potatoes

Directions

Place potatoes on oven-safe plate.
Layer ingredients on top of hash browns with cheese being the last layer and bake until golden brown and delicious.
Top with horseradish sour cream.


However, I created my own take, with a few minor changes, depending on what I have available in the pantry at the time ( For example, I didn't have fresh tomatoes or onions on hand this morning.).  It is a dish I make often when Jason and Connor are eating bacon and eggs for breakfast, or when I am only cooking for myself.

Laura's BLT Fries

Ingredients
1 tablespoon olive oil
2 small (or 1 large) potato
1 teaspoon minced onion
1 teaspoon garlic powder
1/2 teaspoon paprika
shredded mozzarella cheese (as much or as little as you like, to cover the potatoes
2 slices of bacon, cooked and diced
green onion, chopped
sour cream

(I wrote this recipe out as if I were just cooking for myself, but it is very simple to make this for more people.)

Steps
1) Pour olive oil into skillet and heat pan.

2) Dice potatoes and place in pan.  I typically cook them for around 10 minutes on medium/medium low heat, until they are golden brown and soft to the touch.

3) Once the potatoes seem mostly cooked, turn down the heat to low, add the onion, paprika, and garlic, and cover the potatoes.  Cook for another 5-10 minutes covered, stirring occasionally.

4) Uncover your potatoes, sprinkle them with the diced green onion, crumbled bacon, and mozzarella cheese. 

5) Dump the contents of the skillet onto your plate, add sour cream (if you love it like I do), and you are ready to eat a hearty, filling, even if it's not totally healthy breakfast. 

Happy eating!  Have a blessed weekend!