Showing posts with label recipes. Show all posts

Monday, February 20, 2012

Shrimp and Bacon Stuffed Baby Potatoes

I found this recipe from the Better Homes and Gardens All-Time Favorite 2012 Cookbook.  My friend Carrie-Nell and I were celebrating New Year's Eve together when we saw the recipe, and I knew immediately that with my love of shrimp (and carbs) I'd have to try it.

My only complaint with the final product is that since I used frozen shrimp (really our only option here in RC), the shrimp itself was still a bit flavorless, despite all the flavors in the rest of the dish.  Any advice on that issue would be greatly appreciated.  I also changed the wording of the recipe a bit, because it was confusing at times.

Besides that, it was a delicious meal that we'll definitely have again.

Here goes:

Ingredients:
14 small new potatoes
2 tablespoons Dijon mustard
1 tablespoon olive oil
2 teaspoons seafood seasoning (I actually Googled what seafood seasoning was and just mixed up my own batch with spices I already had.)
1 7-to-8-ounce package frozen peeled shrimp (thawed, drained, and chopped)
4 oz. cream cheese
1 cub shredded Gouda cheese
5 slices bacon (cooked, drained, and crumbled)
1/4 cub fresh chives (optional)


Directions:
1. Preheat oven to 425.
2. Cut potatoes in half lengthwise.
3. Scoop out potato pulp (potatoes have not been cooked), leaving 1/4 inch shells.  Toss the potato pulp.
4. Cut a thin slice from the bottom of each potato to make it stand upright. (This really helped.)
5. Place potatoes, cut sides up, in a baking pan.
6. In a bowl combine mustard, oil, and 1 teaspoon seafood seasoning.  Brush insides of potato shells with this mixture.
7. Bake for 30 min.
8. While potatoes are cooking, make filling using shrimp, cream cheese, Gouda cheese, bacon, and the other teaspoon of seafood seasoning.
9. Spoon filling into shells.
10. Bake for 12-15 min., until filling is heated through and cheese is melted.
11. Garnish with chives.

shells, not yet cooked

mustard mixture

shrimp, cream cheese mixture

cooked shells, filled with shrimp mixture

finished product


The magazine called for this to be an appetizer, but it made a delicious meal, along with some veggies, for our little family.  Hope you enjoy!

Monday, September 5, 2011

Pioneer Woman's Onion Strings

As is usual for almost every Labor Day weekend since Jason and I have been together, he worked a Christian youth retreat known as Chrysalis.  Although the prospect of spending Friday through Monday without my best pal was a little disheartening, my mom and dad did a great job of helping to keep me entertained, and Mom and I also spent hours setting up, dowloading, and teaching Gran all about her new iPad (jealous).

The upside (though minimal) to Jason being gone is that I am able to cook foods he doesn't like, without any guilt or need to cook something extra to appease him. 

Therefore, after watching The Pioneer Woman's new Food Network program, I was inspired, started searching her blog, and came across this recipe for onion strings.  While I do not love raw onions, if you cook or fry or otherwise make them soft or crunchy or somehow unhealthy, I could eat my weight in them.  My favorite have always been the onion straws from Ruby Tuesday, but I was told last time that they no longer serve them.  :(  What better time, then, to learn to make them myself?  :)

You can see the above link for all of PW's photos and details, but here are a few of my photos and the results of my first time ever making onion straws, Pioneer Woman style (the recipe and instructions just below this paragraph came straight from PW's blog, but the photos and comments below the recipe are mine):

Ingredients

  • 1 whole Large Onion
  • 2 cups Buttermilk (I had no buttermilk, so I used regular milk...see her blog, link above, for details)
  • 2 cups All-purpose Flour
  • 1 Tablespoon (scant) Salt
  • 1/4 teaspoon (to 1/2 Teaspoon) Cayenne Pepper
  • 1 quart (to 2 Quarts) Canola Oil
  • Black Pepper To Taste

Preparation Instructions

Slice onion very thin. Place in a baking dish and cover with buttermilk and soak for at least an hour.
Combine dry ingredients and set aside.
Heat oil to 375 degrees.
Grab a handful of onions, throw into the flour mixture, tap to shake off excess, and PLUNGE into hot oil. Fry for a few minutes and remove as soon as golden brown.
Repeat until onions are gone.
Eat before your family sees them.
Repeat with another onion, because they’ll be really mad they didn’t get any.


For me, this process really was just as easy as she said it would be.  I let the onions soak longer than an hour, because of an unexpected trip out of the house, but I don't think it hurt them at all.

I should have sliced them a bit more thinly, but my knife wasn't as sharp as it needed to be.

flour mixture

soaking in milk (since I had no buttermilk)

coating the onions

trying not to set off the smoke alarm while frying

Finished, crispy product!

They turned out to be nice and crispy, despite the fact that I did burn the first batch a little too much (I don't fry very often.).  After the first mistake, I got the hang of how long to leave them in to make them golden without burning them.

My only complaint/thing I would change for next time would be to reduce or completely remove the use of cayenne pepper.  I am not opposed to spicy foods, but even the small amount I used (1/4 teaspoon) gave me a little bit more of a kick than I was looking for.  However, once I dipped them in some cool ketchup, the flavor was just about perfect.

All in all, it was an easy, fun recipe, and I got to enjoy some yummy fried onions with any complaints from Jason...about the onion or my breath.  :)

Monday, August 29, 2011

Carrot Cake

My husband is a pretty picky eater.  In fact, until he was 19 he thought corndogs actually had corn in them, and he had never eaten a strawberry until our second date.  He is, however, slowly beginning to try foods he would never have even considered before, and just a few weeks ago discovered that he loves carrot cake. 

As soon as I heard this, it was my mission to find a great carrot cake recipe to make for him (which we both ended up sharing with our colleagues at school as well), so I went straight to the source, Gina, the person whose carrot cake he loved so much. 

She shared with me that this recipe originally came from a Southern Living cookbook, but also let me know that if she had to do it over again, she would modify a couple of things.  Therefore, I am only posting below the recipe I ended up using, which, thankfully, Jason loved.  The cake turned out to be moist and not too dense (but still substantial) and the frosting was just the perfect consistency and flavor to balance out the sweetness of the carrot and the perfect bite of flavor from the cinnamon.


Carrot Cake

Ingredients
2 cups shredded carrots
2 cups self-rising flour (The orignial recipe called for all-purpose, baking powder, baking soda, & salt, but I improvised and it was just fine.)
2 cups sugar
1 teaspoon cinnamon
3 small jars baby food carrots
4 eggs, well beaten
1 1/4 cups vegetable or canola oil
1 teaspoon vanilla extract

Directions
1) Combine shredded carrots, flour, sugar, and cinnamon in a large bowl.
2) Stir in the baby food, eggs, oil, and vanilla, mixing well.
3) Pour batter into 3 greased 9-inch cake pans, or one 9x13-inch baking pan (I actually only had two large round pans that were the same size, so I used them, and it worked perfectly.).
4) Bake at 350 for 30 minutes, or until a wooden pick inserted in the center comes out clean. (I actually ended up leaving the cake on the bottom rack in for about 35 min.  It wasn't solidified enough after only 30 min.)
5) Cool on a rack.  If removing cake from the pans, allow them to cool for 10 min., then remove to a cooling rack.

Cream Cheese Frosting

Ingredients
1 (8 ounce) package of cream cheese, softened
1/2 cup (1 stick) butter, softened
1 (16 ounce) package OR 2 cups powdered sugar
1 teaspoon vanilla extract
Directions
1) With an electric mixer, combine cream cheese and butter until smooth.
2) Add powdered sugar and vanilla; beat until light and fluffy.

Frost cake and enjoy!

finished product


I am linking up this post with Recipe Sharing Monday at Jam Hands.  There are some fantastic-looking recipes I can't wait to try on her blog!

Jam Hands

Wednesday, July 27, 2011

Ice Cream Cake

Last Christmas, my sis Linds and I took up the challenge of making our own ice cream cake for our family's game night/Christmas celebration, which means that this is an old recipe, but one I haven't shared before.

As a disclaimer, this recipe isn't as simple and quick as the majority of the other recipes I post.  Most of the time, I like meals that are easy, that use ingredients I have on hand, and that I know my family will love, but in this case, we decided that the time and effort was worth the result, and I think it really turned out well.  It isn't so much that making the cake is difficult; it is instead time-consuming, with several steps that have hours of freezing time between them.  So, if you plan to make this, allow yourself a couple of days; it isn't something you can throw together at the last minute.

I haven't made it again since Christmas (There hasn't really been an occasion for it.), but I would love to play around with the flavors (see my note at the bottom of the recipe), and I definitely plan to make it again for a special occasion.  It would be fantastic for a birthday, anniversary, holiday, etc...

I found this recipe on a Food Network show called "Dessert First."  I love the host's take on dessert, how unique and decadent her recipes are, and how simply she explains the steps.  I watched the show and paused along the way instead of just following the recipe and it helped tremendously.  If you haven't seen the show before, definitely check it out!


Chocolate Peppermint Ice Cream Cake

Ingredients

Crust:
  • 1/2 cup plus 3 tablespoons unsalted butter
  • 1 2/3 cups semisweet chocolate
  • 2 (9-ounce) packages chocolate wafer cookies (about 80 cookies)
Glaze:
  • 3/4 cup heavy cream
  • 1/4 cup plus 3 tablespoons light corn syrup
  • 1/2 cup semisweet chocolate
Filling:
  • 8 cups vanilla ice cream, slightly softened
  • 1 1/2 cups coarsely crushed red and white striped hard peppermint candies (about 10 ounces)
  • 2 teaspoons peppermint extract

Directions

For the crust:

1) In a small heavy bottom saucepan over low heat, melt the butter and chocolate.
2) Remove from the heat.
3) Finely crush the chocolate wafers in a plastic bag with a rolling pin, or use a food processor.
4) In a large bowl, combine the wafer crumbs with the melted chocolate and blend until the crumbs are moistened.
5) Reserve 1 1/4 cups crumb mixture in a small bowl.
6) Press the remaining crumb mixture onto the sides and bottom of a 9-inch diameter springform pan with 2 3/4-inch high sides.
7) Freeze for 1 hour.


For the glaze:

1) In a large heavy bottom saucepan, bring the cream and corn syrup to a boil.
2) Remove from heat, add the chocolate, andwhisk until it is melted and smooth.
3) Let stand until cool but still pourable, about 1 hour.


For the filling:

1) In a large bowl, working quickly, mix the ice cream, crushed candies, and extract until blended.
2) Spoon half of the ice cream into the crust, spreading it evenly.
3) Put the remaining ice cream mixture in the bowl in the freezer.
4) Sprinkle the reserved 1 1/4 cup cookie crumb mixture over the ice cream in the springform pan, press the crumbs down gently.
5) Pour 1 1/4 cup of the chocolate glaze over the ice cream in the springform pan.
6) Freeze for 1 hour.
7) Top with the remaining ice cream, and spread evenly.
8) Freeze until firm, about 4 hours. Stir the remaining glaze over low heat, just enough so that it is pourable but not warm.
9) Pour the glaze over the ice cream, and spread evenly.
10) Freeze overnight.
11) Run a sharp warm knife between the pan sides and the crust to loosen the cake.
12 Release the pan sides and transfer the cake to a platter.
13) Garnish the cake with Candy Brittle.

*Note from Laura: Even though this is how the recipe reads, if I were doing it again, I would switch steps 4 and 5, pouring the glaze first and then sprinkling the crumbs.  It was hard to get the glaze to cover the whole layer after I put the crumbs on first.


Candy Brittle:
  • 2 1/4 cups sugar
  • 3/4 cup water
  • 2 tablespoons plus 2 teaspoons light corn syrup
  • 2 cups assorted candies (hot cinnamon candies, after dinner mints, candy cane pieces, sliced spice drops) 
1) In a heavy bottom small saucepan over medium-low heat, cook the sugar, water, and corn syrup until the sugar dissolves.
2) Increase the heat and boil, without stirring, until a candy thermometer registers 300 degrees F, about 15 minutes.
3) Place a 24-inch long sheet of foil on your work surface. Be extremely careful, the syrup is extremely hot.
4) Pour the boiling syrup in wide zigzag lines across the foil.
5) Working quickly and using an oiled offset metal spatula, spread the syrup evenly onto the foil, leaving a 1-inch border.
6) Immediately sprinkle with all the candies, pressing the larger pieces into the syrup to make sure they stick. Be careful not to touch the syrup.
7) Cool completely.
8) Break off irregular pieces of the brittle and peel off the foil as you go.
9) Press the brittle upright, candy side out, onto the top and sides of cake and freeze.


*NOTE OF RECIPE CHANGE: I personally LOVE the chocolate/peppermint combination, but my family was not so keen on the idea, so instead of making my own peppermint ice cream, as the recipe calls for, I instead used cookies and cream ice cream, and it went over just as well.  I would like to try the peppermint next time, however.


straight from the freezer, before decorating

finished candy brittle, before breaking


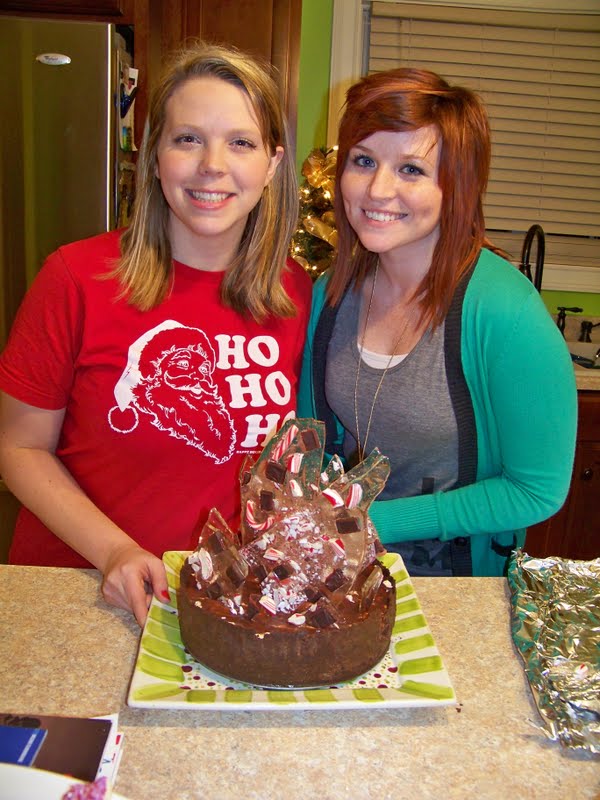
ready to eat!


with our masterpiece  :)
digging in

Saturday, July 23, 2011

Pita Pizza

This summer, Jason and I have really tried, when we aren't traveling, to eat all three meals at home, instead of being tempted to run out and get something.  We have made some massive trips to the grocery store, but as a result, we have had some great successes in learning to fix a filling, usually healthy lunch while we are at home all day.  It is easy for me at home to snack, but when we make a concerted effort to make a "real" lunch, I find that I don't munch on chips or cookies as often.

I have to give full credit for this recipe to Jason and Men's Health magazine.  Jason introduced me to this recipe when he was on one of his Abs Diet kicks (which he is back on again...sometimes I hate how easily he can lose weight, when I struggle so much).

What I love about this recipe is that it is one of my favorite foods, pizza, but done in a way that makes it healthy, and the perfect portion for lunch.  The ingredients are minimal and common in most households.

Pita Pizza

Ingredients
whole wheat pitas
marinara sauce (or other pizza/tomato sauce you like -- We LOVE Kroger's organic marinara sauce...it has a great flavor.)
shredded mozzarella cheese
*any other pizza toppings you like/have on hand (I make mine plain cheese, but Jason likes Canadian bacon on his.)

Steps
1) Preheat oven to 475.

2) Place pitas on baking sheet. (I use my Pampered Chef pizza stone b/c I think it cooks the best.)

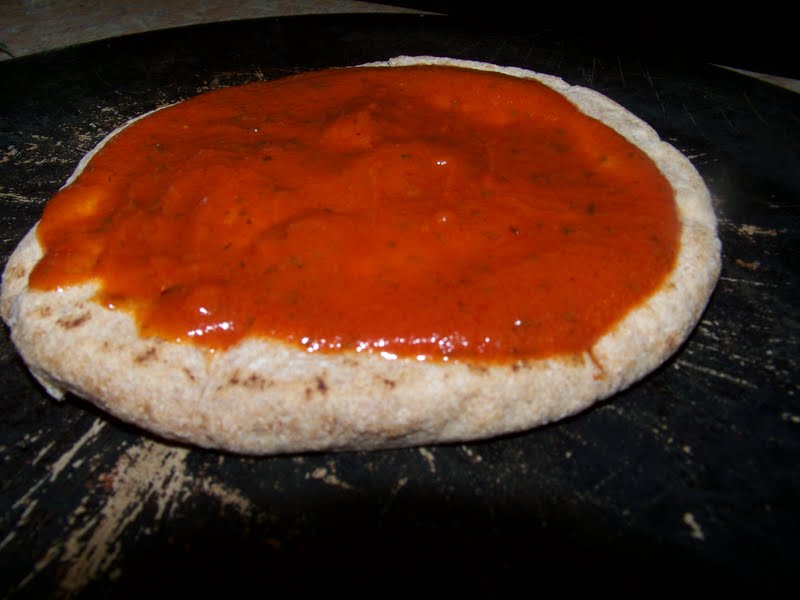
3) Spoon marinara sauce onto pitas. (I like a lot of sauce, so I use about 3 tablespoons per pita.)

4) Sprinkle cheese on top of sauce, as little or as much as you like.
5) Add any other pizza toppings you like.

6)  Bake for 6 minutes.

7) Remove from oven, let cool, and cut into slices.


Even Connor likes these easy pita pizzas!  Hope you enjoy!

Friday, July 22, 2011

BLT Fries

If you've read my post about Bourbon Ball French Toast here, you know that I love breakfast from Lynn's Paradise Cafe in Louisville.  My second favorite breakfast there, below the French toast, is definitely the BLT fries.  Essentially they are fried potatoes with cheese, bacon, spinach, onions, tomatoes, and sour cream (Lynn's uses a horseradish sour cream.).

Here is the recipe from Lynn's:


Ingredients

1 1/2 C. Spinach (shaved)
1/2 C. Bacon (diced and crisped)
1 C. grated Jack Cheese
1/4 C. diced tomatoes
1/4 C. Red Onion - diced and gently sauteed
1 plate Idaho Russet hash brown potatoes

Directions

Place potatoes on oven-safe plate.
Layer ingredients on top of hash browns with cheese being the last layer and bake until golden brown and delicious.
Top with horseradish sour cream.


However, I created my own take, with a few minor changes, depending on what I have available in the pantry at the time ( For example, I didn't have fresh tomatoes or onions on hand this morning.).  It is a dish I make often when Jason and Connor are eating bacon and eggs for breakfast, or when I am only cooking for myself.

Laura's BLT Fries

Ingredients
1 tablespoon olive oil
2 small (or 1 large) potato
1 teaspoon minced onion
1 teaspoon garlic powder
1/2 teaspoon paprika
shredded mozzarella cheese (as much or as little as you like, to cover the potatoes
2 slices of bacon, cooked and diced
green onion, chopped
sour cream

(I wrote this recipe out as if I were just cooking for myself, but it is very simple to make this for more people.)

Steps
1) Pour olive oil into skillet and heat pan.

2) Dice potatoes and place in pan.  I typically cook them for around 10 minutes on medium/medium low heat, until they are golden brown and soft to the touch.

3) Once the potatoes seem mostly cooked, turn down the heat to low, add the onion, paprika, and garlic, and cover the potatoes.  Cook for another 5-10 minutes covered, stirring occasionally.

4) Uncover your potatoes, sprinkle them with the diced green onion, crumbled bacon, and mozzarella cheese. 

5) Dump the contents of the skillet onto your plate, add sour cream (if you love it like I do), and you are ready to eat a hearty, filling, even if it's not totally healthy breakfast. 

Happy eating!  Have a blessed weekend!

Wednesday, June 15, 2011

Homemade Cinnamon Rolls

I am not usually much of a breakfast eater, something which totally annoys my husband.  He loves a huge breakfast of bacon, eggs, toast, etc..., but is typically unwilling to get up on school days in time to make and/or eat such a breakfast.  With getting Connor and myself ready and out the door, big breakfasts in our house are usually reserved for weekends and summer.  Therefore, the last couple of weeks we have had a wide variety of breakfasts, but my favorite was this morning's.

Several years ago my mom came across a recipe for homemade cinnamon rolls, but with a twist.  I am not sure where she obtained this recipe, but they are my favorite cinnamon rolls ever and I am about to share the recipe with you. (Warning: These cinnamon rolls are VERY rich, sugary, and buttery...all of which makes them delicious, but if you are counting calories, they probably aren't the breakfast for you.  But hey, I think we all need a treat every now and then, right?)

Homemade Cinnamon Rolls

Ingredients
1 can crescent rolls (I used reduced fat.)
1/2  cup sugar
2 tablespoons cinnamon
8 large marshmallows
1/4 cup butter, melted

Steps
1.  Preheat oven to 350.

2.  Combine sugar and cinnamon in a small bowl.

3.  Melt butter in a small bowl and place next to the bowl of cinnamon/sugar.

4.  Dip each marshmallow in butter.

5.  Roll each marshmallow in the cinnamon/sugar mixture, coating it well.

6.  Place coated marshmallow on one of the crescent rolls, rolling it up and pinching it into a ball.

7.  Repeat with the remainder of the marshmallows.

8.  Place rolls in a greased muffin tin or other baking dish.

9.  Mix the remaining butter and cinnamon/sugar together, making a "sauce."  Pour this mixture over the tops of the rolls.

10.  Bake for 15-18 minutes.

11.  Enjoy!  :)

This is also an easy dish to double if you are serving several people, and the leftovers are even great the next day!

Step by Step Photos


Ingredients: marshmallows, butter, cinnamon/sugar, crescent rolls
dip marshmallows in melted butter
coat with cinnamon/sugar mixture
wrap crescent roll around coated marshmallow
all 8 rolls, wrapped and ready for cinnamon/sugar/butter topping
cinnamon/sugar/butter mixture
ready to bake
coming out of the oven
finished product
ready to devour
I hope your family enjoys these as much as we do!

Monday, May 2, 2011

Champagne Cupcakes

To preface this recipe, let me say that I love two things in particular about this recipe:

1)  It's for cupcakes...which I LOVE.  It's totally illogical, but there is something vastly cuter and more appealing about a cupcake than a piece of cake.  Besides that, during our annual visit to Chicago last summer, my love for cupcakes grew after visiting Sprinkles (You might recognize the owner of Sprinkles, Candace Nelson, as a judge on "Cupcake Wars.").  I have never had such a moist, delicious cupcake in all my life.


Sprinkles -- best cupcakes I've ever had

2) The recipe is EASY.  I love the Food Network, and although this recipe isn't from this show, one of my favorites is "Semi-Homemade with Sandra Lee."  I enjoy cooking elaborate meals and desserts occasionally (Soon I plan to post my ice-cream cake recipe, which took two days to complete.), but most of the time I enjoy cooking with items I have on hand, not making EVERYTHING from scratch, but still having delicious meals.  The beauty of this recipe is that you use a boxed cake mix, but spice it up to make it special.  That is something that definitely appeals to this busy mom!

The below recipe was originally found and tested by my mom for our Easter celebration at Gran's house (We both made slight changes to the original recipe, which I will make note of.  The recipe was first found at The Tasteful Life, but from what I read, seems to be originally a Betty Crocker recipe.)  I made these for my small group yesterday, and it seemed to be a hit.  Hope you enjoy as well!


Champagne Cupcakes

Ingredients

1 box Betty Crocker® SuperMoist® white cake mix (not Vanilla or Golden)
1 ¼ cups champagne (I used sparkling white grape juice)
1/3 cup vegetable oil
3 egg whites
3-4 drops red food coloring

--Champagne Frosting--
½ cup butter, softened
4 cups powdered sugar
¼ cup champagne (again, I used sparkling white grape juice)
2 teaspoons vanilla 
3 drops red food coloring (I wanted my cupcakes to stay white, so I did not include this.)

--Garnish--
Sugar crystals
Edible pink pearls

Preparation

1. Heat oven to 350°F (325°F for dark or nonstick pan). Place paper baking cup in each of 24 regular-size muffin cups. (I actually have the silicone baking cups, and I love them, b/c they cook evenly and I never have any problem with burned edges.)

2. In large bowl, combine dry cake mix and champagne. Add oil, eggs and food color. Beat with electric mixer on medium speed for 2 minutes. Divide batter evenly among muffin cups. (A little less than ¼ cup per cupcake.)

3. Bake 17 to 22 minutes or until toothpick inserted in center comes out clean. Cool 10 minutes; remove from pan to cooling rack. Cool completely, about 30 minutes.

4. In medium bowl, beat frosting ingredients with electric mixer on medium speed until smooth. Frost cupcakes. Sprinkle with sugar crystals and pearls.

Finished products:


Enjoy, and have a blessed week!

Tuesday, April 19, 2011

My Foray into French Toast

If you know our families at all, we like to eat.  Whether it's a home-cooked meal or a restaurant, we simply love food, and the fellowship that goes along with it.  When I started thinking about writing a blog, I knew that I wanted food to play a role.

When visiting Louisville, one of our favorite spots, especially for breakfast, is Lynn's Paradise Cafe.  Jason's breakfast standard is bacon and eggs, but my favorite by far is the Bourbon Ball French Toast (although the BLT Fries are also delicious).

At Lynn's, about to devour their famous French toast
I have always wanted to try to make this dish at home, but every time I looked at the recipe, I'd get overwhelmed and never follow through.

However, during spring break I finally printed off the recipe, went to the grocery, and invited my parents and sister over for breakfast that Wednesday, to ensure that I wouldn't back out.  I am happy to say...it was a HUGE success!  Jason even gave it a 10 out of 10.

Below, I have posted the recipe from Food Network (Lynn's was on an episode of Throwdown with Bobby Flay), as well as some notes of my own about the changes I made.  This recipe did take about an hour, including prep and cook time, but it was well worth it for a special breakfast treat.  I will definitely make it again.  Hope you enjoy!

Finished product

Bourbon Ball French Toast

Ingredients

Batter:
  • 6 eggs
  • 1/2 teaspoon ground nutmeg
  • 1/4 teaspoon cinnamon
  • 1/8 teaspoon salt
  • 1 1/4 cups milk
  • 1 teaspoon vanilla extract
French Toast:
  • 1 (16-ounce) loaf firm textured bread, preferably a baguette (The restaurant uses cinnamon swirl bread, so that is what I bought, even though that isn't what this recipe called for. I loved the extra kick of cinnamon.)
  • Canola oil, for frying
  • Bourbon Vanilla Custard, recipe follows
  • Chocolate syrup
  • Kentucky Bourbon Whipped Cream, recipe follows
  • 1 pint fresh sliced strawberries
  • 1 cup toasted pecan halves
Directions

For the batter:
Beat all batter ingredients together in a medium-sized bowl. Set aside.

For the French Toast:
Slice the baguette into 18 thick slices. Soak the slices in the batter for about 3 minutes, turning to coat evenly on each side.  (I would actually suggest veering from the recipe here.  On the first few slices, I left them for a couple of minutes and they were way too saturated.  I would just dredge them for a few seconds.)

Heat oil in a large saute pan over medium-high heat.

Lift the bread from the batter and place it in the hot pan. Add only enough slices to fit easily in the pan. Saute on both sides until golden brown. Keep warm until all slices have been cooked.

Place 3 slices on each plate. Drizzle with warm Bourbon Vanilla Custard. Garnish with chocolate syrup and Kentucky Bourbon Whipped Cream. Top with sliced strawberries and toasted pecan halves. Serve immediately.

Bourbon Vanilla Custard:
  • 2 cups half-and-half
  • 1 cup heavy cream
  • 4 large egg yolks
  • 1/2 cup sugar
  • 4 teaspoons cornstarch
  • 2 teaspoons vanilla extract
  • 1/3 cup Kentucky bourbon  (I left this out and the consistency was still good.)
Heat half-and-half and whipping cream in a small saucepan over low heat, until the mixture begins to simmer.

Remove from heat and set aside.

Whisk egg yolks, sugar and cornstarch in a stainless steel bowl for about 2 minutes or until the mixture thickens and lightens in color. Slowly pour the hot cream into the egg mixture, whisking constantly. Return the custard to the saucepan and place over low heat. Stir constantly until the mixture reaches 170 degrees F. Remove from heat and stir in the vanilla and bourbon. Serve immediately or hold over a hot water bath.
Yield: 3 1/2 cups

Kentucky Bourbon Whipped Cream: 
(I just used premade whipped cream, but I'm sure this would be yummy)
  • 2 cups heavy cream
  • 3 tablespoons powdered sugar
  • 3 tablespoons Kentucky bourbon
Whip cream in well chilled mixing bowl just until soft peaks form. Add powdered sugar and bourbon and whip just long enough to incorporate. Taste and adjust flavors. Chill until ready for use.
Yield: 3 cups

Ready to dig in

Connor stuffed his face, too!